Join us

A Git and Jira Integration Guide: How to Connect GitHub, GitLab, and Bitbucket to Jira Cloud

Zrzut ekranu 2026-02-20 125153

TL;DR:

If you ask a developer, product manager, and QA “why integrate your Git repository with Jira,” they will all give different answers. Some like it for reducing context switching and providing automation options, while others value the transparency and improved traceability. But no matter who you ask, everyone is unanimous: this integration is immensely useful for the teams.

In this article, we focus on the most popular Git applications: GitHub, GitLab, and Bitbucket. We explain how to connect them to Jira Cloud and provide you with practical tips on making the most out of this integration. You will learn how to use smart commits, leverage automation, and gain extra value from third-party apps.


The Basics: What Can You Do With The Help Of This Integration?

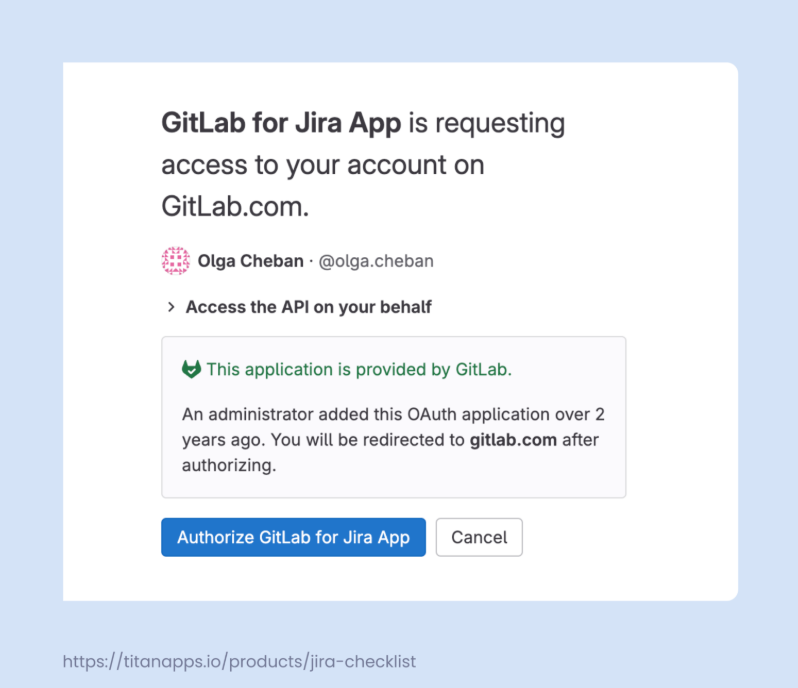
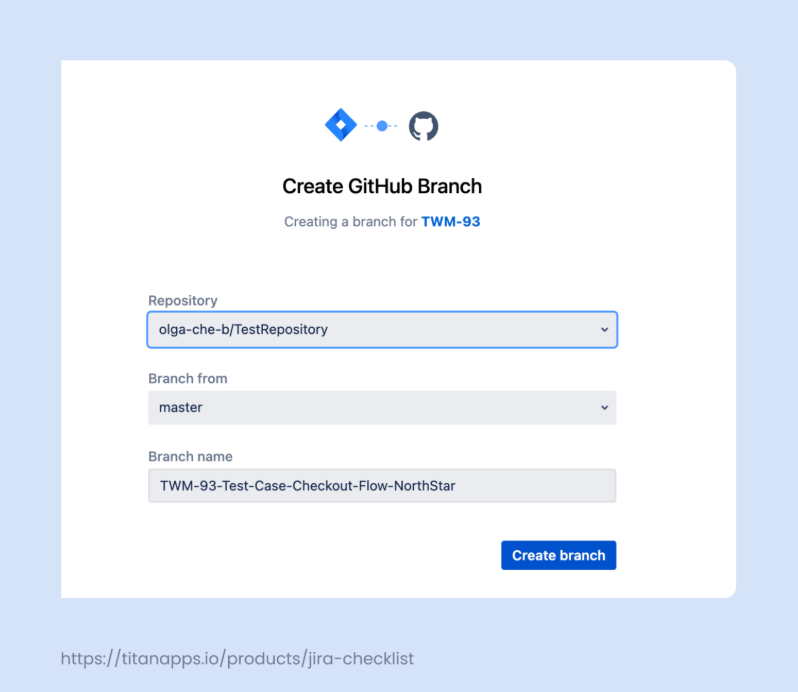
Connecting your Git repositories to Jira creates an important link between a Jira ticket and your code. With real-time synchronization between the two platforms, you avoid the need to switch back and forth and write updates manually. The key actions in your Git app will be reflected in the corresponding Jira ticket. You simply need to mention its issue key/work item key when creating a new branch, commit, or pull request.

In particular, you will be able to:

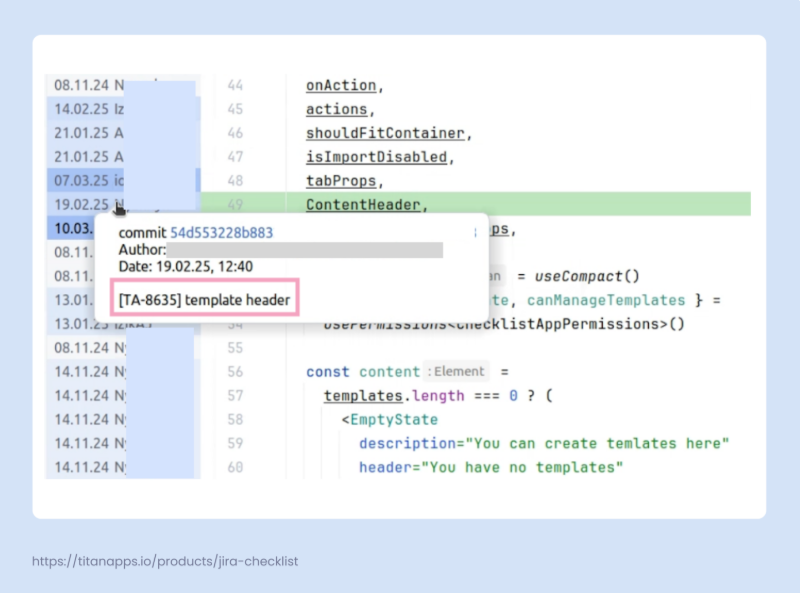
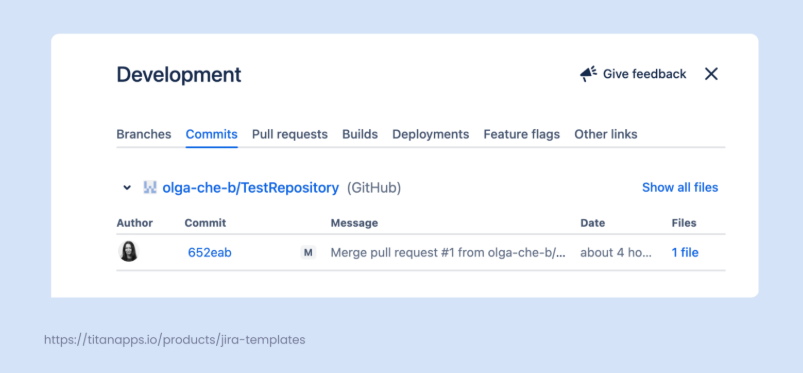
  • View commit history, branch, and pull request details in Jira
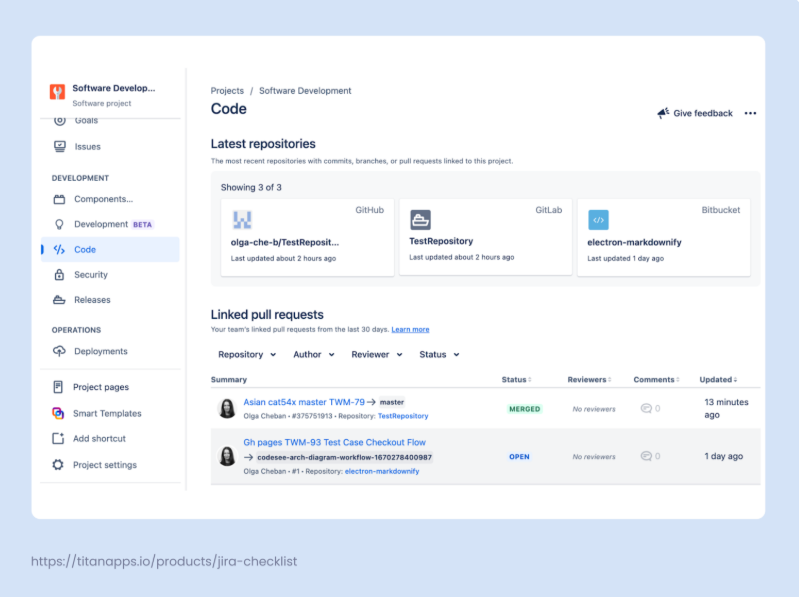
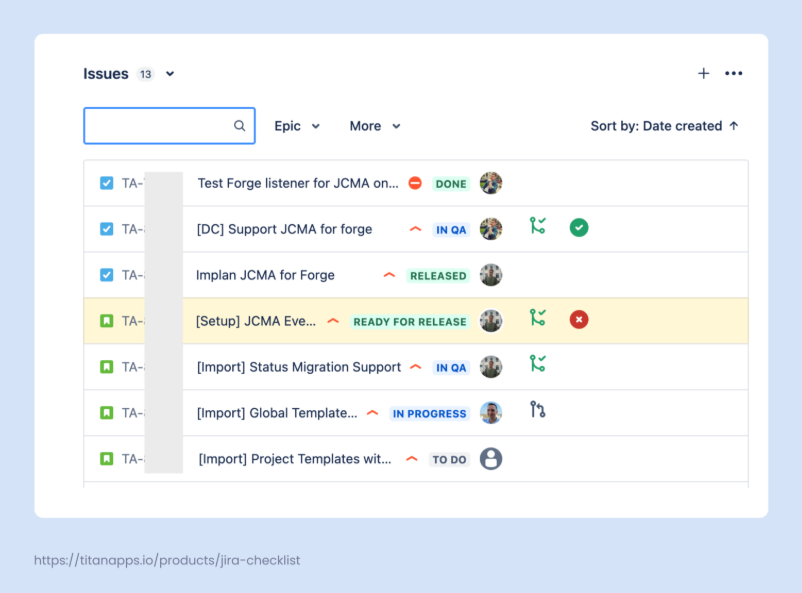
  • Check pull request statusesdirectly from your Jira board
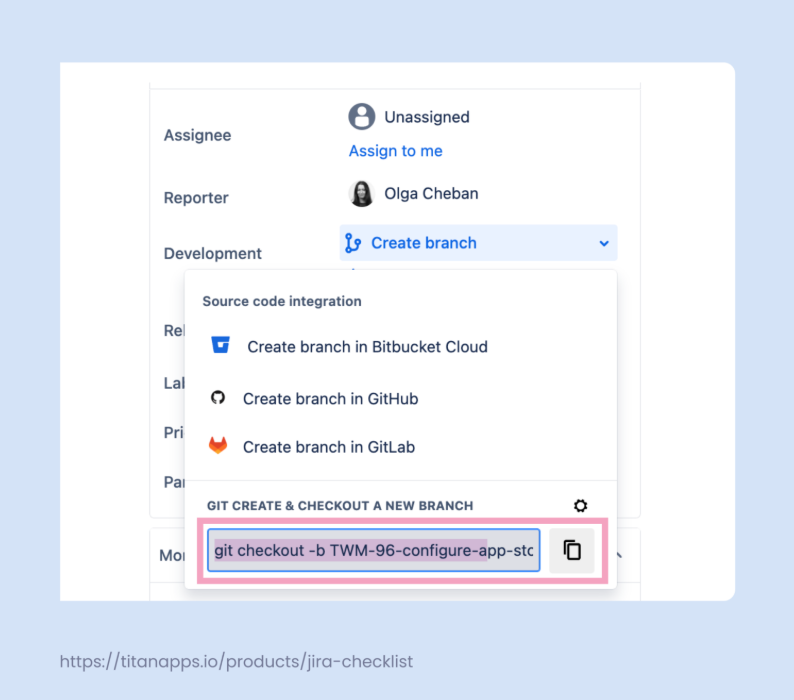
  • Quickly access a pull request or branch from the ticket details
  • Automatically update work statuses based on Git activity
  • Add comments and log work in Jira directly from your Git app
  • Get more context for code changes with business details from Jira

The key benefits of setting up a Git and Jira integration include:

  • Less context switching: You can seamlessly move from Jira to your Git app if needed, or you can just manage your Jira work items without leaving your Git platform. This is much more efficient and improves focus.
  • Transparency: This integration helps keep everything organized and transparent. A product manager can see what was done for each work item without leaving Jira. In turn, developers can gain more context for old code changes by checking which Jira tasks they are related to:

  • Better communication: Transparency facilitates more effective collaboration, especially for cross-functional processes. Getting necessary information is easier, leading to better alignment and organization among teams. 
  • Time optimization: As routine updates become automated, teams spend less time manually syncing statuses or adding links between Jira and Git. 

These and other benefits are why this integration is so widely used. The value it delivers results in streamlined processes and increased productivity.

How to Set Up a Git and Jira Integration for a Cloud Instance?

There are two main options:

  • Connect Git and Jira natively: Jira has a built-in Git connector, but it’s only available for Bitbucket.
  • Use a Git app from the marketplace: Available for various platforms, including GitHub and GitLab.

The process itself is straightforward. First, you need to install the integration app (except for Bitbucket) and connect your repositories. Then, link Git activity to Jira work items by using issue keys. After this, you will be able to view dev information in Jira tickets, use smart commits, and set up automation to further optimize your work. Let’s explore this in detail.

Install the Integration App and Connect Your Repositories

Bitbucket

For a native integration with Bitbucket, open your Jira project and navigate to Settings -> Products -> Integrations block, where you can find DVCS accounts. Then, connect your account and grant the requested permissions. Your repositories will be automatically connected to Jira.

For other tools, use an app from the Atlassian marketplace.

GitHub

Install GitHub for Jira and connect your GitHub account. Select your organization and specify which GitHub repositories you want to link. This can be All repositories or Only select repositories. Grant the requested access permissions, allowing Jira to pull information from GitHub and vice versa. 

GitLab

Once you have installed GitLab for Jira, follow the wizard’s prompts to complete the setup. Specify which version of GitLab you are using: for the cloud-hosted version, select GitLab.com. Then, sign in to GitLab and authorize GitLab for Jira. Once done, link your GitLab groups.

To complete the integration process, you will need administrator permissions, as well as the relevant permissions on your version control platform. For the most up-to-date information on the required permissions, it’s best to review the requirements provided by your Git platform during the integration setup.

Please note that this article focuses on the integration with the cloud versions of Git platforms. If you need to connect Jira to GitHub Enterprise Server, Self-managed GitLab, or Bitbucket Data Center, please refer to the official documentation.

Link Your Git Activity to Jira Work Items

Even though your repositories are already connected, the synchronization with Jira may not be complete yet. To finalize this process, you need to link your Git activity to specific Jira issues (work items). This can be done by simply including Jira work item keys in your Git messages:

  • Commits
  • Branch names
  • Pull request titles and descriptions

A work item key (or Jira issue key) is a combination of letters and numbers that serves as a work item identifier in Jira – for instance, TA-9082 or PROJ-123. You can find it at the top of a work item view. On your Jira board, it’s at the bottom of the card.

When you mention a work item key in your Git message, the system recognizes it, and the message is then associated with the work item it mentioned.

For example, this can be a commit message like this one:

git commit -m “TWM-93 <Fixed all bugs>” 

Information about this commit will be available in the Development section of the mentioned work item’s view. You can link branches and pull/merge requests to specific Jira work items in the same way.

It’s enough to use one work item key and push changes to the connected repository to complete the synchronization with Jira. After several minutes, it should be fully connected to your version control application. Needless to say, you can still use work item keys in your Git messages whenever you need to link an action to a Jira work item.

View Development Information and Create Branches in Jira

You can monitor Git actions in Jira in several ways, each providing a different perspective. Let’s have a look at these options.

Check your repositories and pull requests from the Code tab

Once your Git and Jira integration is set up, the two apps will be fully synced. As a result, you will be able to see the connected repositories and the latest activity on the Code tab in the Development section in Jira:

Get granular details from a work item view

In addition, you can view development information directly from your Jira work items. Open a work item view, which is an individual page for the selected Jira task, story, bug, etc. Find the Development section in the menu on the right, and click on any branch or commit message. 

In the pop-up window that appears, you will see the detailed development information:

This includes a list of commits with various details and a link to the repository. Additionally, there is information about the associated branches and pull requests. This is especially valuable for product managers, as they can easily see all the dev events linked to a specific work item.

Monitor the overall progress from the Release Hub

If you have a company-managed project and work with fix versions in Jira, you can also track ticket statuses from the release hub. In the Jira project menu on the left pane, find Releases in the Development section. Select the release you need and scroll down to Issues/Work Items

You will see Git statuses for each work item, if relevant. The status icons have different colors:

  • Green – there is a merged pull request for this ticket
  • Black – there is a pull request that is still waiting for review or approval
  • Blue – a branch has been created, but there is no pull request yet
  • No icon – there’s no development activity for this work item

Create branches, commits, and pull requests from the work item view

In addition to monitoring Git information, you can also perform various actions directly from Jira. Open a work item view and navigate to the Development section. From there, you can create branches, commits, and pull requests. 

For example, to create a branch, select your source code integration from the dropdown and provide the required details: repository, branch from, and branch name. These steps are the same for both GitLab and GitHub integration.

Alternatively, you can simply copy the text from the box, as shown below, and run this command in the terminal in your Git project. In this case, you don’t need to specify any additional information, and the branch will be created more quickly.

Use Smart Commits to Manage Jira Work from Your Git App

It’s possible to make changes to Jira work items directly from a Git platform. This is done with the help of smart commits, which are commands included in commit messages. They enable you to perform actions such as:

  • Adding comments to the specified Jira work items
  • Recording time-tracking information
  • Changing an issue’s workflow status / work item status

This allows you, for example, to move Jira tickets from In progress to In review or Done without leaving your Git app, and so on. Once Jira is integrated with GitHub, GitLab, or Bitbucket, smart commits should be enabled by default. 

A smart commit message has the following syntax:

<ignored text> <ISSUE_KEY> <ignored text> #<COMMAND> <optional COMMAND_ARGUMENTS>

The system won’t consider parts of the message marked as ignored. In its simplest form, such a message can only consist of an issue key and a command, such as “TA-095 #close” or “RW-123 #comment fixed.”

Here are the syntax formulas for each of the available commands:

  • #comment <comment_string>
  • #time <value>w <value>d <value>h <value>m <comment_string>
  • #<transition_name> #comment <comment_string>

The <comment string> is an optional element for all commands except for the first one, #comment. When specifying the transition name, you need to provide a Jira issue status that is included in your team’s Jira workflow (such as Ready for QA or Completed). If the status name has more than one word, replace spaces with hyphens, for example: #ready-for-qa.

For more information, please refer to the official documentation

Using smart commits helps developers reduce context switching and enhances transparency.


Let's keep in touch!

Stay updated with my latest posts and news. I share insights, updates, and exclusive content.

Unsubscribe anytime. By subscribing, you share your email with @viktoriiagolovtseva and accept our Terms & Privacy.

Give a Pawfive to this post!


Only registered users can post comments. Please, login or signup.

Start writing about what excites you in tech — connect with developers, grow your voice, and get rewarded.

Join other developers and claim your FAUN.dev() account now!

Avatar

Viktoriia Golovtseva

@viktoriiagolovtseva
Experienced Content Writer & Marketer, passionate about crafting strategic content that drives results and exploring the intersections of content and product marketing to create impactful campaigns.
Developer Influence
80

Influence

5k

Total Hits

27

Posts