


Today we will learn how to install Hashi Corp Vault in local Kubernetes cluster and how to manage secrets in Vault and also how to inject these secrets via side car to .Net Core container.
Before we start we need a few things to get started,
- Docker Desktop with Kubernetes enabled (or you can use other tools such as minikube) to have a local cluster
- Helm to install Hashi Corp Vault
- kubectl to check deployments and pod status
- Visual Studio 2022 for .Net Core Appliction
- Lens ( I will be using lens as Kubernetes Dashboard, it is very powerful dashboard tool)
- Argo CD and GitHub actions ( for CI/CD purposes, you can skip it and directly deploy from local)
If you want to learn more on Argo CD and GitHub Actions, please follow below link,
https://medium.com/c-sharp-progarmming/azure-function-app-on-kubernetes-with-github-actions-and-argo-cd-series-part-i-624b08233795
https://medium.com/c-sharp-progarmming/azure-function-app-on-kubernetes-with-github-actions-and-argo-cd-series-part-ii-c23631824ad4
Before we dive in to hands on, let’s understand what is vault and how it works in Kubernetes cluster,
What is Vault?
Hashi Corp Vault is an identity-based secrets and encryption management system. A secret is anything that you want to tightly control access to, such as API encryption keys, passwords, and certificates. Vault provides encryption services that are gated by authentication and authorization methods. Using Vault’s UI, CLI, or HTTP API, access to secrets and other sensitive data can be securely stored and managed, tightly controlled (restricted), and auditable.
A modern system requires access to a multitude of secrets, including database credentials, API keys for external services, credentials for service-oriented architecture communication, etc. It can be difficult to understand who is accessing which secrets, especially since this can be platform-specific. Adding on key rolling, secure storage, and detailed audit logs is almost impossible without a custom solution. This is where Vault steps in.
Vault validates and authorizes clients (users, machines, apps) before providing them access to secrets or stored sensitive data.
(Reference: https://www.vaultproject.io/docs/what-is-vault)
How Secrets are injected in to the containers by Vault?

So let’s get started, first we need to Install Vault,
- First run below command to add Hashi Corp Helm repository,

2. Now update the Helm repo to get the latest changes,

3. Now create a new namespace named hscvault, in K8s, this where all our vault related deployment will be kept,

4. Now set this namespace to current kubectl config context,

5. Now we will deploy, Vault in development mode, there are different profiles available for different purposes such as dev, standalone, ha, and external. For our purpose, we will use dev.
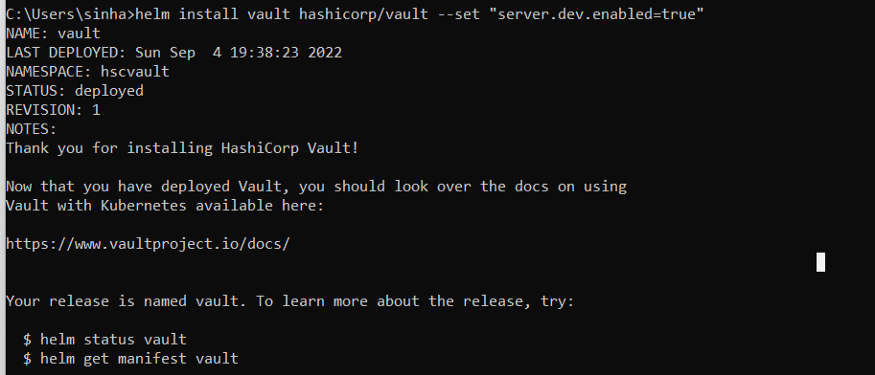
6. Now check the pods, we can see that vault has been installed successfully.

Sealed/Unsealed
Whenever a fresh installation of Vault is done, Vault is in sealed state, it is meant that, vault is aware of the storage but unaware of decryption.
For this, we need to unseal the vault, we will need to obtain the root key, so that vault will be able to decrypt it.
For dev installation we do not need to unseal it, as it will be unsealed mode but for standalone and ha mode, it needs to be unsealed.
Now, we will learn how to extract root key and setup Vault for our usage,
Let’s extract the root key by running below command,

Copy and keep the token safe with you. ( I am sharing the full image as I will be deleting the pod once my blog writing is done, but please be careful, while handling these secrets)
Now we need to setup K8s authentication, so that services or applications that we are deploying can access Vault without using root key, as root key will have maximum privileges. Let’s set it up now,
Start an interactive session in the vault-0 pod,

Run below command to enable Kubernetes Authetication,

Once Kubernetes authentication is completed, we need to provide Kubernetes cluster API details to vault so that it can authenticate it,

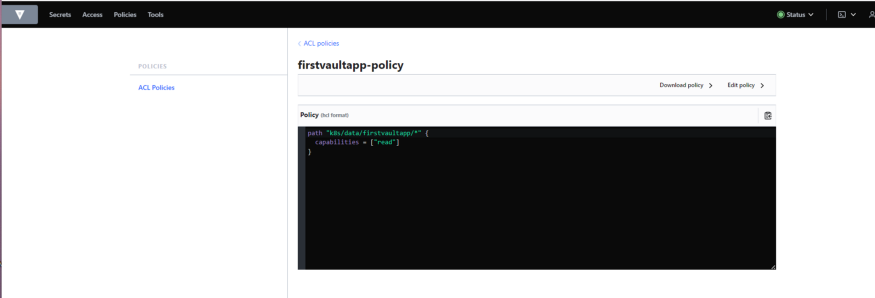
Now, we have provided our cluster details to Vault. Now we will create a policy for our applications fetching secrets from vault. Mostly applications only need read access, so we will create a policy with read access for this,

*Please remember, we need to create a KV engine which will satisfy the above path “”k8s/data/firstvaultapp/*” for which we have created the role. We will create it later using UI. Our path should be “k8s/firstvaultapp”.
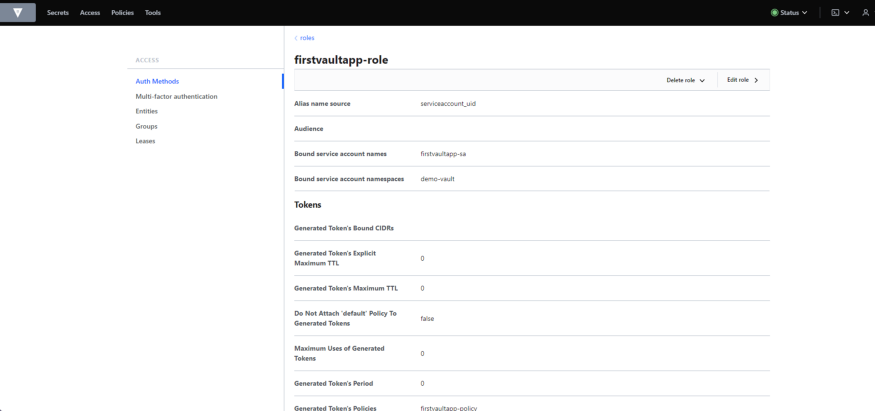
Now our policy is also created, so we will create a new role named “firstvaultapp-role” and map it with a Kubernetes Service Account Name and policy “firstvaultapp-policy” (which we just created).

The role connects the Kubernetes service account firstvaultapp-sa, and namespacedemo-vault, with the Vault policy, firstvaultapp-policy. The tokens returned after authentication are valid for 24 hours.
Now exit the interactive shell,


To verify the same things from UI, you can do port forward for vault-0 pod and login using the root key, extracted earlier,


http://localhost:8200/
Now you can go to Access and Policies to verify recently created Policies and Access rules,
Now we are done with our Vault Setup, let’s move on to Side Car Injection Part,
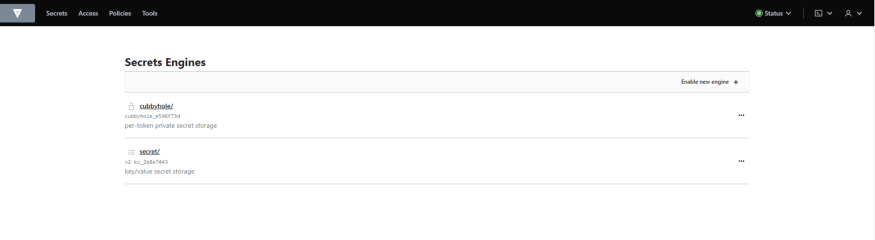
To do that, let’s create a KV secret engine for all our applications related secrets via UI (path to be same as provided in the policy),
Go to Secrets → Enable New Engine → Choose “KV”

click on Next


Let’s create Some Secrets in k8s engine,
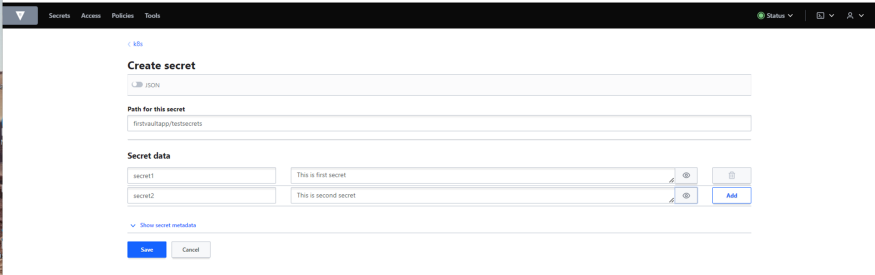
Click on Save

Now let’s quickly create a template Web API application in .Net Core, that will return the Secrets in one of the endpoint. We will skip the application creation steps this time, as it is pretty simple and I will share the repo for your reference (https://github.com/arkapravasinha/FirstVaultApp.API )
Our deployment.yml looks like this,
If you look closely, we are injecting secrets via annotations and we are also templating it, so that it can be understandable to the application. It is very important to provide Service Account Name so that our pod can authenticate with vault.
And also in the application, we are injecting the secrets in middleware, via Configuration Builder,

Program.cs
I have added a Controller, which will return all the secrets injected,
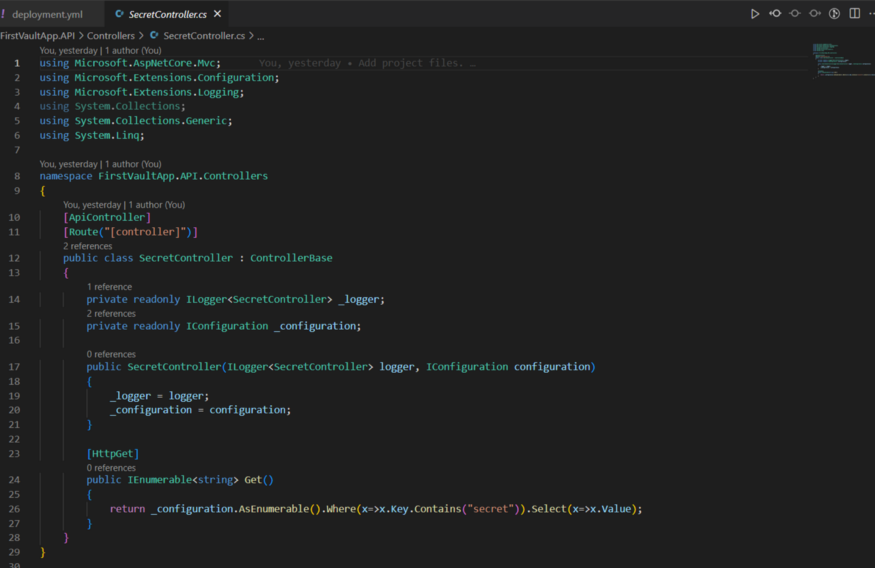
SecretController.cs
Let’s deploy our application and see, I am using GitHub Actions to build my application and Argo CD to deploy my application using GitOps, you can always deploy manually.


Let me share some logs,
Vault Agent Init Container Logs:
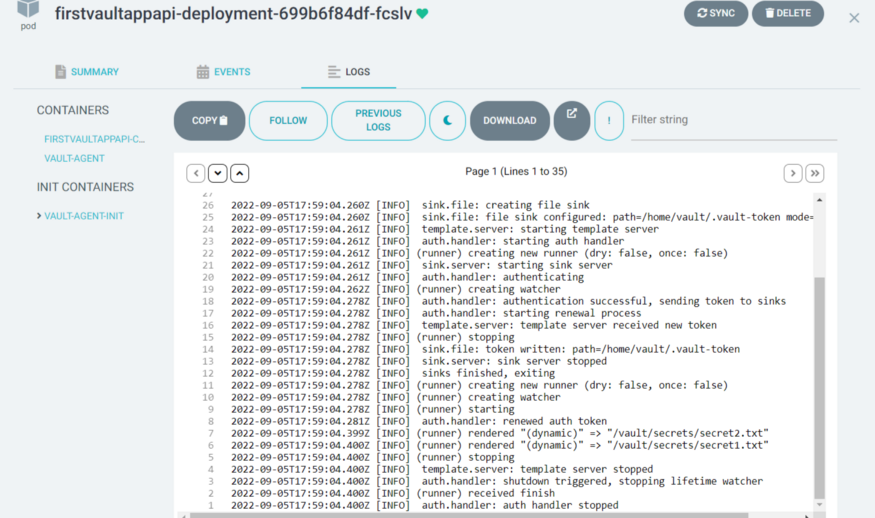
Vault Agent Init, authenticated and mount the secrets and use the same to initialize the vault agent.
Let’s check the secret mount, /vault/secrets/

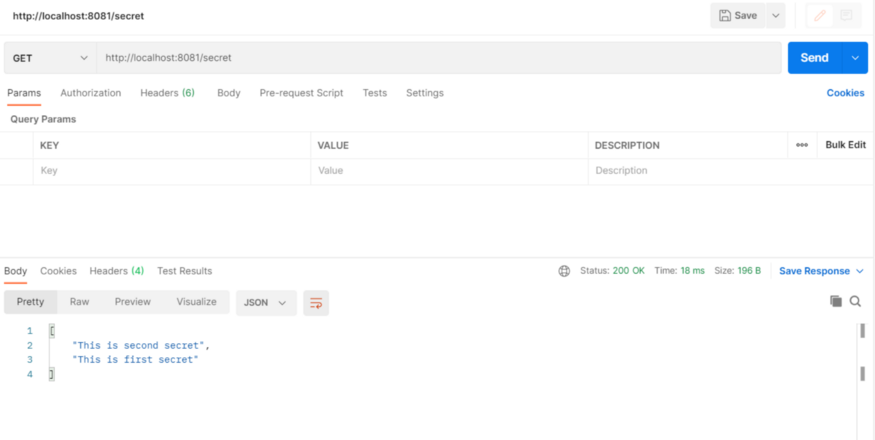
Let’s hit our API endpoint, it should return the same secret values,
Now we know, how to setup and deploy Hashi Corp Vault and use side car injector to inject side car containers to make secrets available in the pod.
Reference:
- Hashi Corp Vault: https://www.vaultproject.io/docs/what-is-vault
Share with your friends and followers
Start blogging about your favorite technologies, reach more readers and earn rewards!
Join other developers and claim your FAUN account now!


User Popularity
74
Influence
7k
Total Hits
1
Posts

Read, Learn, Know, Teach
Hand curated newsletters for Developers, private Slack with like minded people, podcasts, job offers, news and more!

Only registered users can post comments. Please, login or signup.